No photos today.
To get my mind off what is not mentioned here.....
We planted too much in the Vancouver yard. It's been a jungle. In 2012 I moved many trees and shrubs and perennials to the new Battleground place.
Today I moved a few more...
One Nandina.
Two small lilac bushes. Several years ago, we planted a lilac hedge. They were tiny. Some are bigger, but some are too shaded and have too much competition, and are still small. Today I moved those to Battleground. More room, more sun, less competition.
I bought a Mock Orange, Philadelphus "Natchez" at Portland nursery. They don't have much yet. This was left over from last year. So bigger than what will replace it there in a month or two, but more root bound. I cut the roots as I usually do, before planting. Philadelphus has a reputation as a bee forage plant.
I also dug up mini-dwarf Honeycrisp apple. That tree (bush) broke off 2 years ago when I did not thin apples and they weighed down the tiny tree and broke it off. I pruned off below the break. Two new trunks developed, above the graft so stil Honeycrisp. They grew nicely. I plan to graft one trunk, maybe Jonagold. The other will remain Honeycrisp. Maybe I will graft something else and let it grow below the graft, for a 3-variety tree. Undecided.
I also dug up volunteer lavenders, and dug out a half-barrel of Chinese chives. They need regenerating. I want to plant them tomorrow in a raised bed.
Almost forgot - took some cuttings from Hardy Chicago fig. Started as usual with scrubbing, incision, dip-and-grow, moist paper towel in plastic bag, and a label. Assuming they grow - experience says they will - there will be one for Battleground, and several to give away.
Saturday, January 18, 2014
Sunday, January 12, 2014
Thinking about a Sun Room. 1.11.14
 |
| Front Of House |
 |
| Front Of House |
This is the West-facing side of the house. To the right is South, to the left is North. The squarish window with 4 panes opens from the dining room. I think that would be a good place for a sun room. Replace that window with a patio door or french door. The sunroom could be about 100 to 150 square feet. Big enough for plants all around, for starting tomatoes and peppers, okra, figs.... flowers... and overwintering cacti and orchids. Maybe even overwinter a large chili pepper plant. There might be room for the Meyer Lemon - currently bearing - and kumquat. Wow - I just filled up the sunroom, and it's not even designed yet.
I was thinking greenhouse, but sunroom might contribute to solar heating in winter. Or might not be efficient, but would be more protected than a greenhouse, and I could sit in the sunroom and ponder, putter, and stew.
There's a home remodeling show in portland in 2 weeks. It would take my mind off the impending scan....
Saturday, January 11, 2014
Plant Propagation Day. Lilacs, Nandina, Plums, Quince, Forsythia. 1.11.14
 |
| Lilac Sucker |
 |
| Shovel Placement for Lilac Sucker |
The method with the shovel, is to stand it vertically close to the parent shrub, between the parent and the sucker. Make a rapid, firm slice into the soil. Sometimes it takes more than one try. That severs the connection, but leaves most of the sucker's roots intact.
I make the same type of slices around the sucker / baby bush, then slice under it.
Much of the root mass is probably from the old bush, and not connected to the baby bush. That root matrix hold the soil together. Removing it could damage the roots of the new bush, so I left the soil / root matrix in place. It would be nice to see how many roots the baby bush has, but not required. I'm sure there are some.
I also took prunings from Hollywood Plum, Shiro Plum, Pussy Willow - un known variety, Flowering Quince. After removing side branches, I have a bundle of each to experiment with as hardwood cuttings.
 |
| Hardwood Cuttings and Lilac Starts |
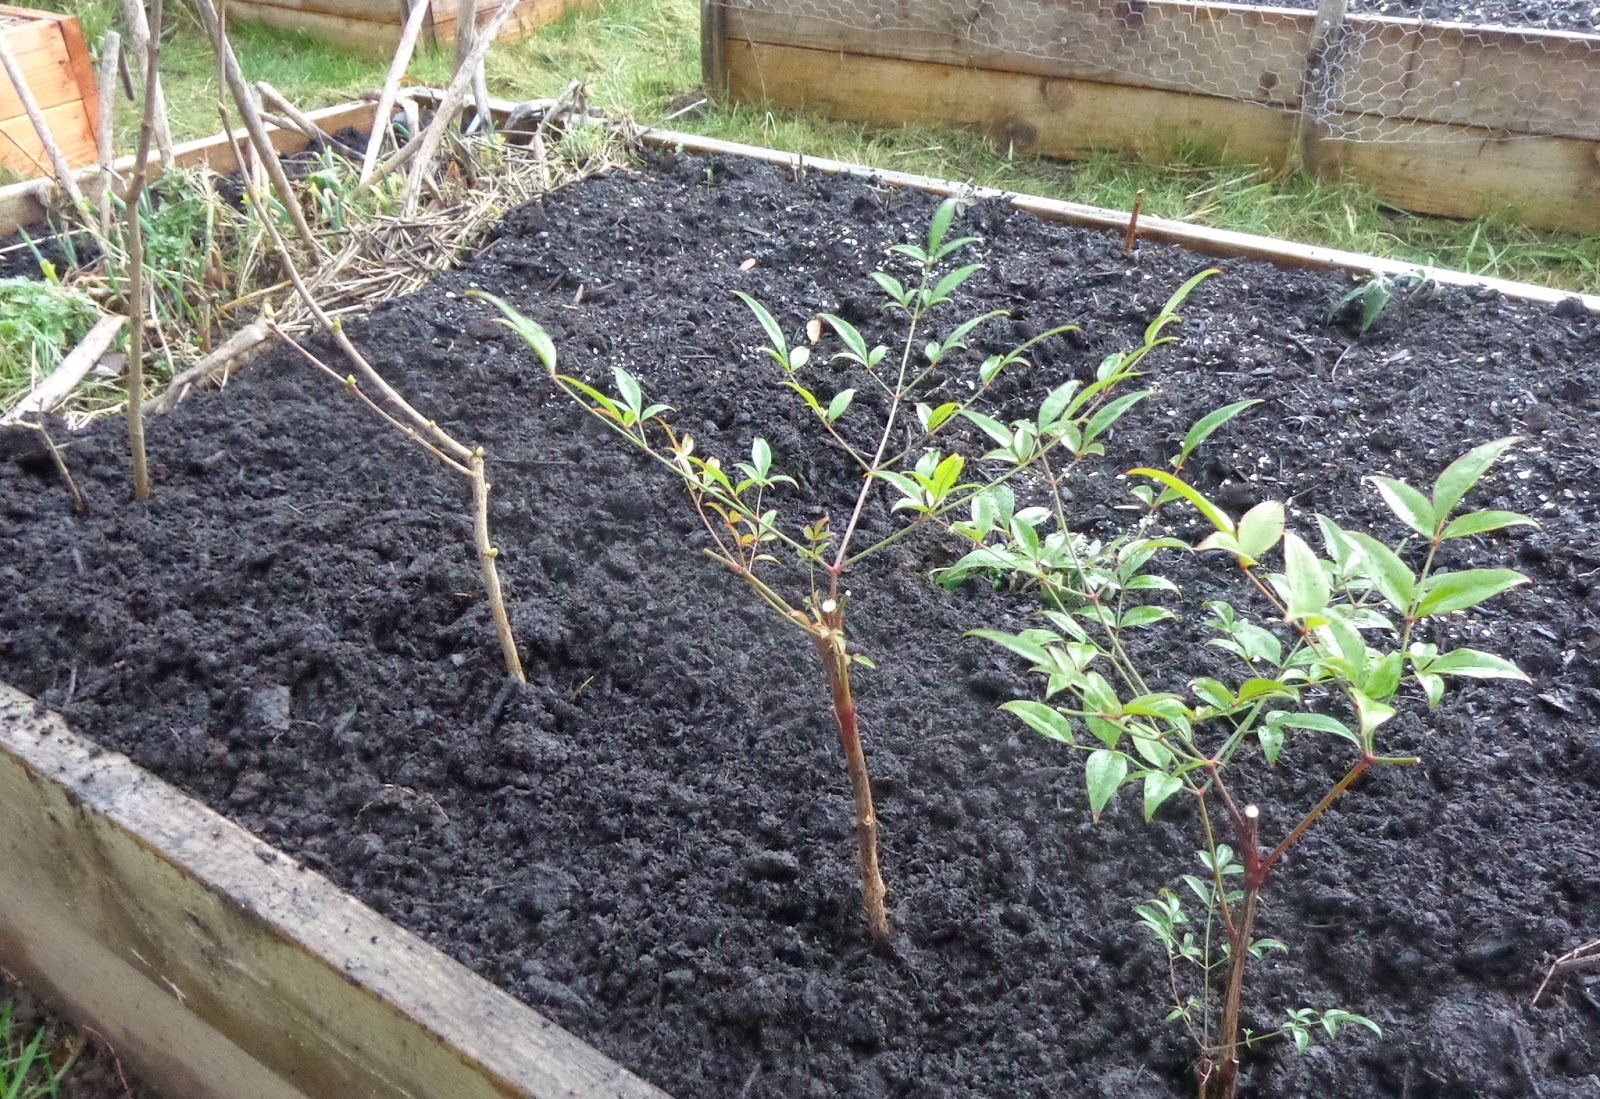
Then I wandered around the yard, looking for other starts. I found two Nandina suckers - Heavenly Bamboo. Pretty bush, bright red berries. So I removed those. Same method as lilac. The suckers did not have much by way of roots, so I pruned the tops to avoid dehydrating the plants until the roots take. Haven't done this with Nandina before.
Then planted the sucker / baby shrubs in vegetable raised bed. They will have a few months to grow more roots, before top grown begins.
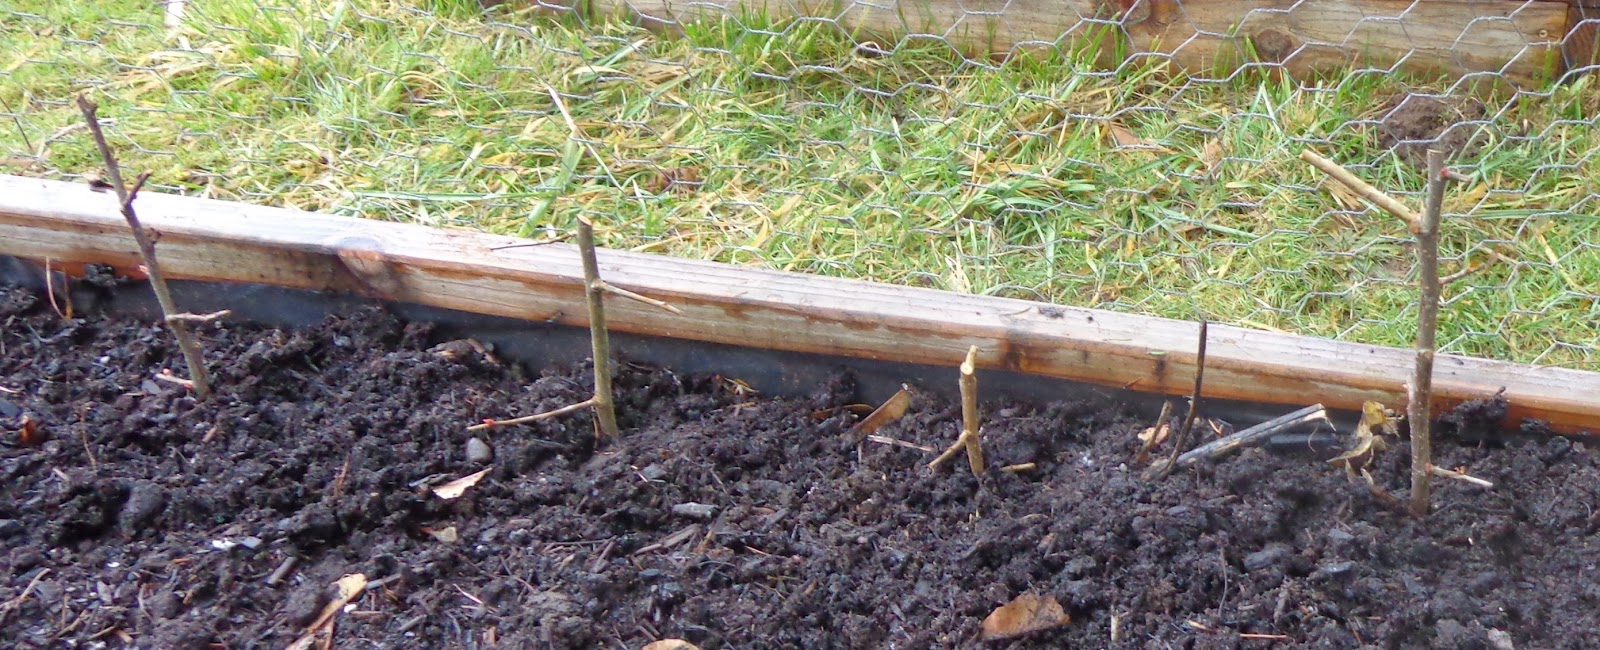
I treated the hardwood cuttings in a similar manner to the fig cutting prep - make an incision in the lower end, to expose cambium. Dip in Dip-and-grow 1:5 dilution for 10 seconds. Then used trowel to make slice into soil.
 |
| Lilac Starts and Nandina Starts |
 |
| Quince Starts |
I don't know if there is even a remote chance for those plums and the quince to take root. Nothing lost if they don't.
I also took a few forsythia prunings. Those were inserted in soil without wounding or dip-and-grow. Mainly because I didn't have any dip-and-grow remaining. Should be OK. Forsythia grows easily.
The pussy willows can just be stuck into the grown about 1 foot deep. Ning did that last year when I was sick, and about 90% took root and grew. Deer then ate some. Others should take off and grow this year. We'll have a hedge of pussy willow.
Carini Fig Cuttings. 1.11.14
 |
| Carini Fig Start |
 |
| Carini Fig Cuttings, showing supplies |
I think fresh cuttings are much more likely to succeed. This time I won't make the same mistake twice. One will go into garage for the winter.
Method-
1. Wash the cuttings.
2. Make incision about 2 cm long, shallow, with sharp knife, near base of cutting. The incision exposes cambium, which is the "stem cell" layer that callouses and forms baby roots. Not required, but looking at the effectiveness of root growth at incision, it helps a lot.
3. Dip in Dip-and-grow at 1:5 dilution for 5 seconds.
4. Wrap in paper towel, moistened with house-plant-food at 7 drops per gallon - the directions for house plants state 7 drops per quart. That is for growing plants in soil. I want just a trace.
5. Place in plastic bag. I like to blow in a little air. Twist and clip.
6. Now it goes onto seed starting mat, with a plastic container between the cutting bag and the mat.
7. Every 2 or 3 days, I open the bags, inspect, rinse the cuttings in plain water.. If there is a start of mold or mildew, I send the paper towel to compost and replace with a new moist paper towel.
 |
| Carini Fig Cuttings, ready to incubate. |
Figs can be grown form cuttings stuck into the garden soil and ignored for a year. This method gets me results much faster. I can see the baby roots form, very rewarding. I can trouble shoot problems, like mold. There are no insects or gnats. The head start gives me a year or more of growth, ahead of starting in the garden.
I really like this Carini. If the outside tree is freeze-killed, one of these will replace it. If not, one goes into container, and the others to give to people who would like a really nice fig start.
Dominick Fig Cuttings. 1.11.14
 |
| Opening the Package - Will there be roots? |
It's fun starting fig cuttings this time of year. These are "Dominick's Fig", an Italian family - heritage fig via a generous member of the fig forum.
I could see there were leaves. It's more important to grow roots at this stage. If there are leaves and no roots, it's more challenging to keep them alive while awaiting roots.
 |
| Dominic Fig Cuttings |
 |
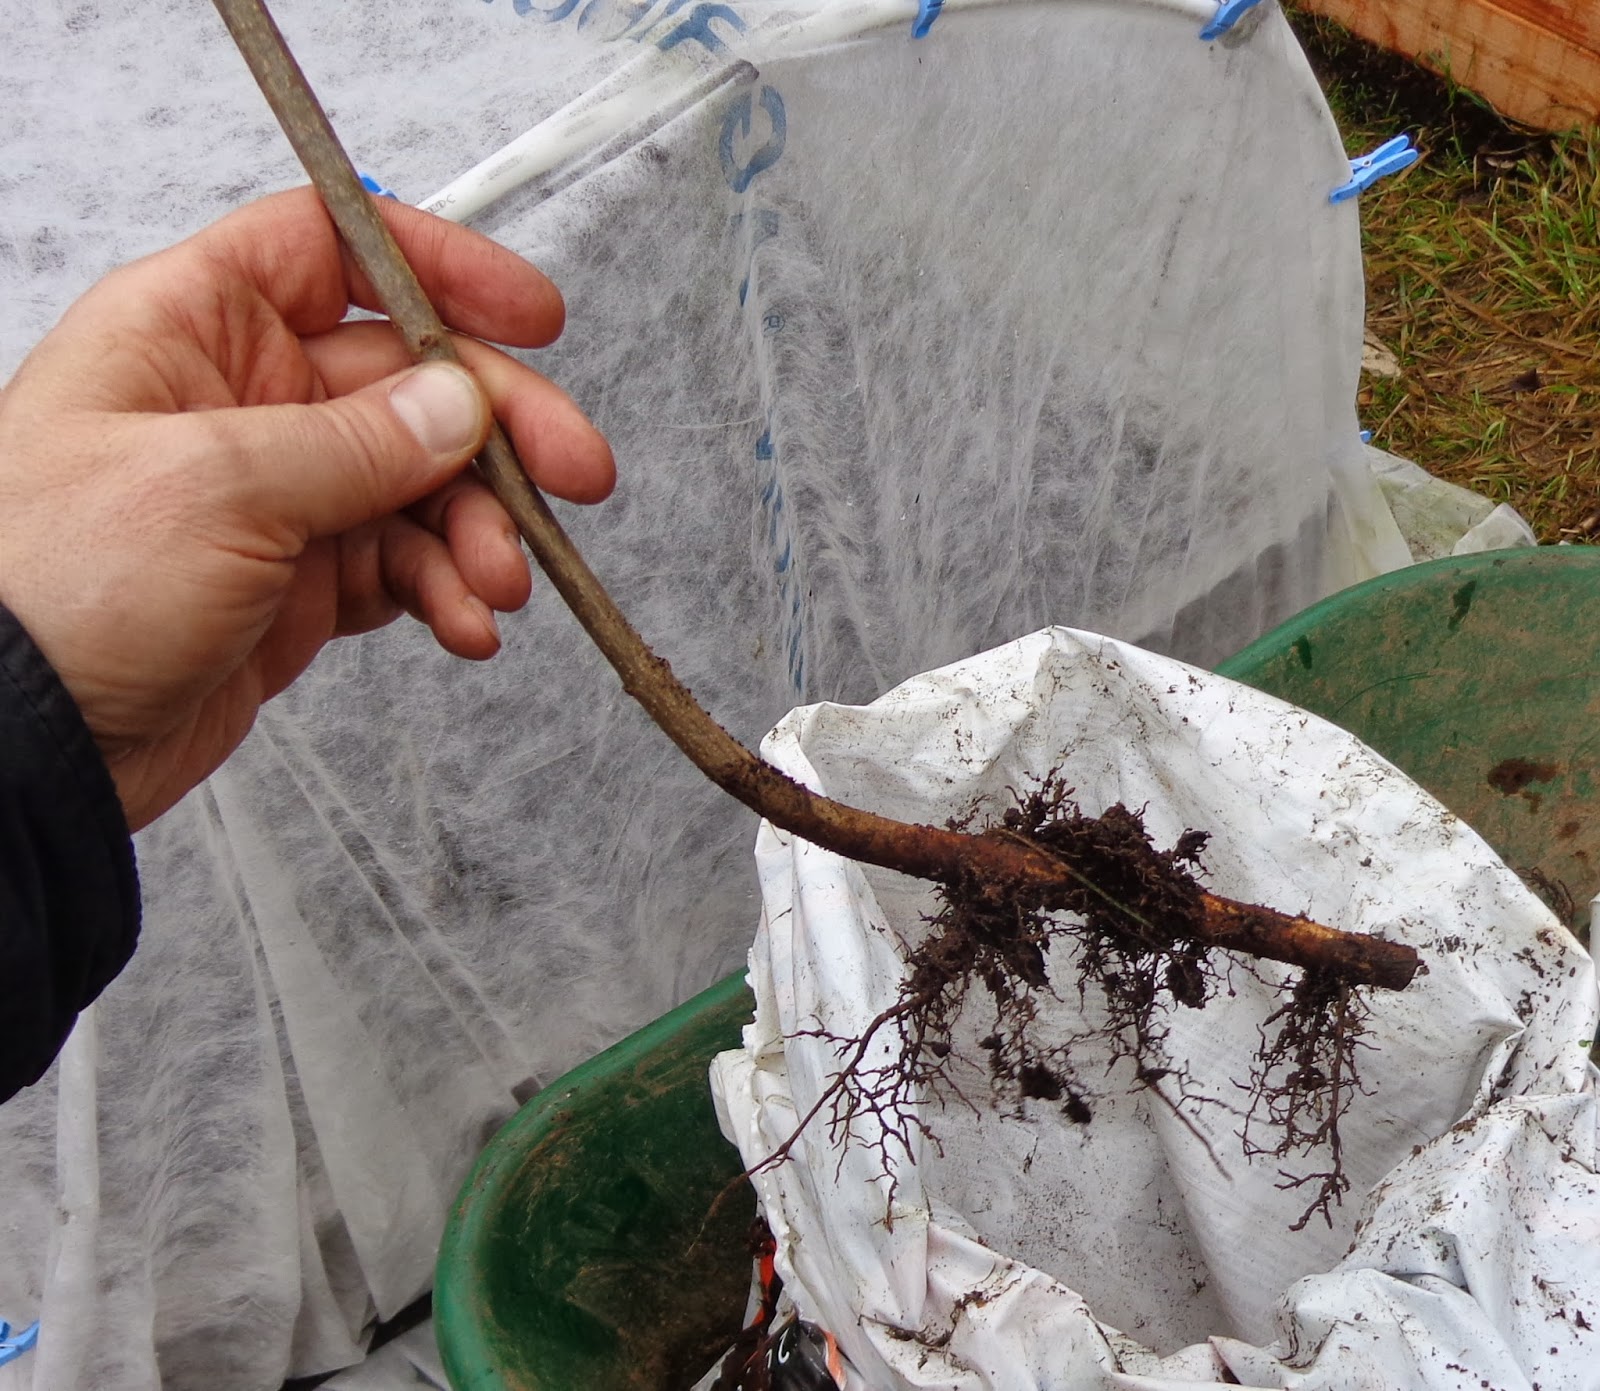
| Dominick's Roots |
I cleaned up some of last year's plant-starter juice cans. Nice size, plant slides out easily for replanting, and theyn are free - recycled - reused. The height / volume are good for transitioning fig cuttings from the paper towel to seed starting medium.
Gently remove paper towel. If roots are stuck to paper towel, I just cut the paper towel and leave it on the root to disintegrate in the growth medium. Doesn't hurt anything.
Then watered in, and return to the plant starting set-up among seedling and other fig cuttings in bags.
Today I also started Carini fig cuttings from another generous fig forum member, and Sicilian White, from another generous fig forum member.
 |
| Plant Nursery. |
Tuesday, January 07, 2014


Taking a start from a Lilac bush. Propagating a lilac bush by removing a sucker. 1.7.14
Doesn't look too promising but I've seen less promising plants grow. So maybe.
I pruned the cut, to make it smooth instead of ragged. Pruned the top back a little. It is dormant, so there are no leaves to transpire and wilt. It will make new leaves at a size it can support with the roots.
Maybe the roots will extend a little during the winter, using reserve stored carbohydrates from the stem. That's why I didn't prune it back more.

If it survives and grows, I can move it to a permanent location next year.
This is the general concept. Traditional and super simple.
Find lilac bush with suckers.
Clear away weeds or stems that might be in the way.
Use shovel to slice through underground stem connecting sucker to parent bush. I try to do this close to the parent bush. That way I get more roots on the sucker.
 |
| Lilac Bush with suckers |
 |
| Newly planted lilac suckers |
Re-plant the sucker - now a new start of the lilac bush - in a sheltered location so it doesn't dry out this year.
This will work for other bushes that develop suckers - figs, forsythia, quince, etc.
I think the main thing is there are already a few roots. A hardwood cutting would be almost the same but without roots. It's more difficult to get roots growing from the stem, than to promote increase of root growth that has already begun.
The drawings are mine. I am not an artist.
Midwinter Gardening. Moving a Plum Tree. 1.7.14
 |
| Methley Plum. Digging it up. |
I thought it would be difficult to dig. It was easy. The move last year resulted in compact root system, not wide ranging. There was almost no root damage. The roots were about one shovel blade deep.
This was my usual method. Slice vertically in circle around tree. Scoop out a moat around tree, digging outside that sliced circle. Then slice under tree with shovel. No prying until I've fully sliced under the tree. It's easy this way, and not traumatic to the tree.
 |
| Transferred to a tarp. |
Those dog food bags have many uses in the garden. I never throw them away.
Then pick up using the tarp, not pulling on the trunk. Use wheelbarrow to move it to the truck. Then transfer into truck bed.
It's an overcast, wet day. Ground was soft. Not raining hard. Perfect for moving a tree.
 |
| Drove it to Battleground. On left is Helleborus. |
Almost in place. Hole is dug. I had a small jujube tree in this location. It's now moved to the bee garden near the other jujube. Those have been disappointing so far. Not much growth, still tiny. This is a good spot, close to the other plum trees. Before planting, I mixed a cup of lime with the back fill soil. I also added mycorrhizal inoculant. I don't think I will buy more of that. Probably not needed. But I have some left over so might as well use it.
 |
 |
| Covered with bird netting to deter deer. |
I don't have fencing to protect from deer, so I covered with bird netting. I sunk the posts into place a few weeks ago, anticipating this move.
Forgot to wrap the trunk to protect from chewing rodents. Other plum tree is not chewed, so it should be OK for the next day. I hope.
Sunday, January 05, 2014
Winter Images. 1.5.14
 |
| Beehive and Bird Feeders |
 |
| Fig Trees Frosty Morning |
 |
| All of the raised beds are built, filled, amended, weeded, and have a layer of compost. |
 |
| Charlie needs the warm blanket, because arthritis. Homework for me. Baigou likes the fire. |
Thursday, January 02, 2014
Shrub Order. Trial for Bee Forage and Deer Resistance. 1.2.14
I placed an order from forestfarms.com. I want to try some additional shrubs for bee forage and deer resistance.
The sterile Buddleias grew very nicely last year. By far the fastest growing shrubs in the yard, bloomed later into the summer and fall, and deer didn't touch them. We want to fill in between them, for a hedge. I want multicolored flowers. Currently, the hedge consists of Buddleia X Flutterby Peach Cobbler (3) and Blueberry Cobbler (1); Miss Ruby (1) and a yellow unknown I suspect is Buddleia globosa.
To fill in the Buddleia hedge, I ordered one sleeve of Flutterby Vanilla (off white), two sleeves of Honeycomb (yellow), and one sleeve of Asian Moon (purple). Combined with the current varieties, that will make a good color mix. They grow so fast, the sleeves - small starts - should fill in fine and bloom this year, and next year catch up with the older shrubs.
The down side for the sterile Buddleias, so far, is they can look weedy, and the early flowers on the long flower clusters dry up and turn brown, before the last flowers open. Which can look shabby, unless they are deadheaded despite the unopened end flowers.
I also ordered 2 sleeves of Philadelphus lewisii - Mock orange. Mock oranges are considered excellent bee attractants. The single-flowered ones are considered more bee friendly than modern double ones. They are native. They are reported as variably deer resistant.
And 2 Hebe hybrids. No photo - not available in public domain. Hebes are also thought to be good bee forage and deer resistant. They will go into the bee garden.
The sterile Buddleias grew very nicely last year. By far the fastest growing shrubs in the yard, bloomed later into the summer and fall, and deer didn't touch them. We want to fill in between them, for a hedge. I want multicolored flowers. Currently, the hedge consists of Buddleia X Flutterby Peach Cobbler (3) and Blueberry Cobbler (1); Miss Ruby (1) and a yellow unknown I suspect is Buddleia globosa.
 |
| Image Source: wikipedia Buddleia "Honeycomb" |
The down side for the sterile Buddleias, so far, is they can look weedy, and the early flowers on the long flower clusters dry up and turn brown, before the last flowers open. Which can look shabby, unless they are deadheaded despite the unopened end flowers.
 |
| Image source: Wikipedia Philadelphusn |
And 2 Hebe hybrids. No photo - not available in public domain. Hebes are also thought to be good bee forage and deer resistant. They will go into the bee garden.
Subscribe to:
Posts (Atom)